

Sump Pump DIY Installation Guide
Step-by-step guide for DIY sump pump installation meeting Ontario Building Code. Learn proper pit installation, electrical requirements, discharge routing, and when to call professionals. Complete instructions for reliable flood protection.
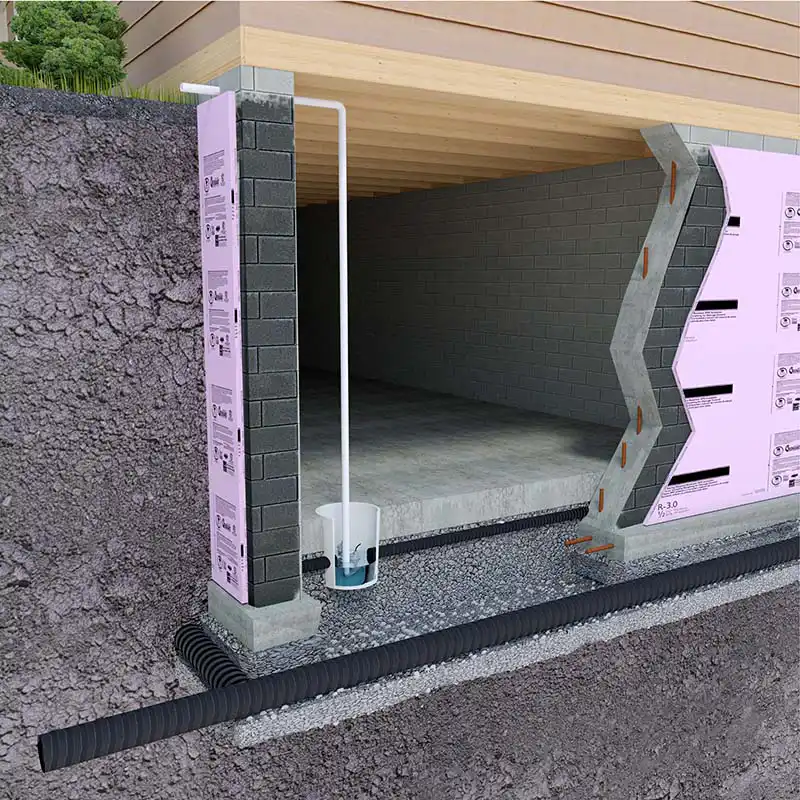
Key Requirements
✓ 30" deep pit minimum
✓ Dedicated electrical circuit
✓ GFCI protection required
✓ 6+ feet discharge from foundation
✓ Check valve mandatory
Service Areas
Service Areas: Toronto, North York, Scarborough, Etobicoke, East York, York, Mississauga, Brampton, Vaughan, Richmond Hill, Markham, and surrounding areas.
A properly installed sump pump protects your home for decades. Take time to do it right. When in doubt, consult professionals - the cost difference is small compared to flood damage.